Feeds:
Posts
Comments

Archive for the ‘The Truth About Dairy’ Category

What is on your holiday table this year?

Tis the season for family gatherings, and that generally means the Traditional comfort foods we often share this time of the year.

When I think of some of the side dishes and accompaniments served at our big family gatherings, I think of Stuffing (otherwise called “Dressing” here in the South), Gravy, and Mashed Potatoes. Unfortunately, most of these recipes thrive on butter, cream, gluten, bread, oils,  and assorted animal protein additions. Traditional though these recipes may be, they leave our bodies heavy with regret, bloat, and an insatiable appetite for something more. A common side effect of a lack of nutrients, and/or lack of absorption of these nutrients.

I wanted to seek out lighter but still flavorful versions to share with my clients, but unfortunately, I could not find one single recipe I was excited about. Instead, I found myself in a sea of vegetarian and vegan renditions that contained excess oils, soy (processed), wheat flours, gluten-free breads (processed), and vegan margarine (processed).

Taking matters into my own hands, I did a little testing myself and I am pleased with the results. I think you will absolutely love these two holiday steals. Bursting with flavor and aromas from an assortment of wild mushrooms, which serve as an excellent and more alkaline replacement for meat, and coupled with traditional herbs, rest assured that you will be sharing these recipes both joyfully and energetically.

Even better, none of these ingredients are too “out of the ordinary.” All of the ingredients can easily be found in your Whole Foods Market or health food store, and many of them in your traditional supermarket.

Wild Mushroom and Quinoa Stuffing, Gluten-Free, Oil-Free, Soy-Free, Vegan by Lauren Talbot 

picstitch

Ingredients:

  • 1 cup uncooked quinoa (about 3 cups cooked)
  • 2 cups water (to cook quinoa)
  • 1 pound baby bella mushrooms, stems removed, cut into thin slices, then in half
  • ½ pound shiitake mushrooms, stems removed
  • ½ pound wild mushroom, or shiitake (to add to texture and flavor diversity) *I Used Oyster
  • 1 medium yellow onion, finely diced
  • 4 cloves garlic, minced
  • 1 cup dry white, divided (I used my favorite Organic Frey Chardonnay)
  • 1 1/2 cups finely chopped celery
  • 1 tsp dried rubbed sage leaf
  • 1 tsp dried thyme leaf
  • 1 tsp dried rosemary
  • Coconut oil for greasing pan
  • ½ tsp sea salt, or to taste, divided
  • ½ tsp fresh ground black pepper
  • 1/8 cup fresh parsley leaves, for decor
  • Sea salt to taste, if needed

Method:

Preheat oven to 375 degrees.

Prepare quinoa according to package instruction, and place to the side. Very lightly grease a large, oven-safe, casserole dish with coconut oil, only enough to prevent sticking, and set to the side.

In a large frying pan, or pot, sprinkle mushrooms with ¼ tsp salt and cover for 2 minutes on medium-high heat, stirring to prevent from sticking. Salting is important, as it will let mushrooms secrete their own juices, and reduce the need for water, oil, or broth. Turn heat up to medium and sauté for 5 minutes, or until mushrooms are darker, and juicy. Scoop mushrooms into your “greased” casserole dish, leaving their juices behind.

In same frying pan, turn up the heat again to high, and add the garlic, onion, and celery. Sauté vegetables until remaining mushroom liquid has evaporated and then sprinkle vegetables with ¼ tsp salt and cover. Allow vegetables to steam on medium-high heat for 3 minutes, stirring if needed. On low heat, uncover and sauté for an additional two minutes, or until onions appear translucent.

Turn up heat and add ¼ cup wine, spices, and herbs. Sauté until wine has evaporated and has been absorbed into the vegetables. Continually sautéing, add in the remaining wine in ¼ cup intervals—each time allowing the liquid’s flavor to be absorbed, before more is added. When all wine has been absorbed, spoon in your quinoa and use a large spoon to combine. Pour mixture into your mushroom casserole dish and combine ingredients, until well integrated. Place in oven for 25 minutes, until quinoa is just barely browning. If you are looking for a crunchier stuffing, stir halfway through. Keep oven on warm until ready to serve. Dish can be made a day in advance and then reheated if necessary. 

Gluten-Free, Vegan, and Paleo Gravy by Lauren Talbot 

picstitch-1

Ingredients:

  • 4 T Coconut Flour, more depending on desired consistency
  • 2 medium yellow onion, diced
  • 1 cup dried porcini mushrooms
  • 6 garlic cloves, minced
  • 2.5-3 cups low sodium vegetable broth, depending on desired thickness
  • 1/2 tsp salt
  • 1 tsp sesame oil
  • 5 tbsp coconut aminos
  • 1 tsp dried thyme
  • ¼ tsp dried oregano
  • ¼ tsp black pepper
  • 2 tbsp nutritional yeast

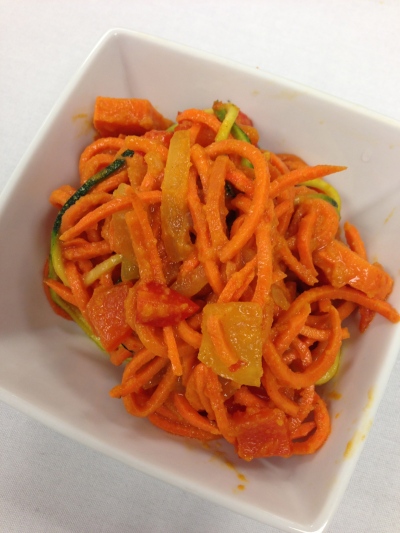
Shown with baked eggplant as a base for this gravy marinade. 

Method:

In a medium frying pan, or pot, sprinkle onion with ¼ tsp salt and cover for 2 minutes on medium-high heat, stirring to prevent from sticking when needed. Add garlic, thyme, oregano, pepper, and ¼ cup vegetable broth. Sauté until onions are translucent.

Add an additional 1/4 cup broth and porcini mushrooms. Cover and allow to steam on low for 3 minutes, or until mushrooms are tender. Uncover, add in remaining broth, and then slowly add in coconut flour, 1 tbsp at a time. Stir until all flour is well combined, and not lumpy.

Carefully scoop hot mixture into high-speed blender. Blend until smooth, adding nutritional yeast, coconut aminos, and toasted sesame oil. Blend again until well combined and season with sea salt to taste.  Serve when ready. Gravy can be made a day in advance and refrigerated. Serve on top of baked eggplant, or baked portabello mushrooms.

Happy Healthy Holidays!

If you want to jump start your metabolism and improve your digestion in the New Year, send me an email at Lauren@theglowdetoxdiet.com and get educated and empowered. 

Read Full Post »

Chocolate Pie

Oh.

My.

Goodness.

I am not one for baked goods, usually opting for a little dark chocolate when I need a dessert, but with so many children-focused families in my practice these days, I had to do a little experimenting.

And…

oh wow.

oh.

WOW.

This chocolate mousse is one of a kind, and so is the crust. No nuts. Not seeds. No soy. No gluten. But oh-so… FLAVOR-FUL. You ready?

Pie Crust

Dry Ingredients

1/2 cup coconut flour

1/4 tsp xantham

1/4 tsp baking soda

1/4 tsp sea salt

3/4 cup baked sweet potato, mashed

Wet Ingredients

1/2 cup coconut cream

1 tbsp raw coconut oil, (or raw coconut butter)

2 tbsp maple syrup, grade b

1 tsp pure vanilla extract

Chocolate Mousse Filling

3/4 cup raw cacao

2 tsp liquid stevia (I used Trader Joe’s)

2 heaping cups mashed avocado

1/2 cup water

Method:

Preheat oven to 375 degrees. Place a whole sweet potato on a cookie sheet and bake for 30-45 minutes, or until just tender. Time will vary depending on size of potato.

Mix dry ingredients in a small mixing bowl, and coconut cream, vanilla, maple syrup and coconut oil in another. Use a whisk or fork to breakdown coconut oil, which will stand hard at room temperature.

Remove sweet potato from oven, and cut a slit down the middle, allowing it to cool. Scrape away skin, and measure out 3/4 cup sweet potato. Add sweet potato to dry ingredients and use hands to combine. Pour in wet ingredients and continue to knead away at the mixture until it becomes a “dough”.

Liberally grease the insides of your deep cake dish with coconut oil to prevent the crust from sticking. Use hands to press the dough into the bottom of the pan, and then press it into the sides of the deep dish. Crust should be about a quarter- inch thick.

Bake crust for 18 minutes, or until crust is dry and firm. Set aside to cool.

As crust is cooling, combine water, and avocado into your high-speed blender, or food processor, and begin to slowly blend until avocado is thick and without lumps. Add cacao powder and blend until smooth. Add stevia slowly, adding more to taste.

slice of pie

Make sure crust easily comes out of pan, using a knife to ease it out of pan and onto a cookie sheet, lined with parchment paper. Scoop mixture into pie crust and use a spoon to smooth out. Place in the freezer for 30 minutes but do not freeze. If you freeze, allow to thaw before slicing and serving.

Slice and enjoy immediately.

Yes.

It is true.

It is that good.

Oh my.

Read Full Post »

image

Mayonnaise scares me and thus, so does Ranch dressing.

When I think of ranch dressing, I think of children dunking prickly, raw broccoli into a glob of white mess, and smiling, as their mother’s applaud their new approval of vegetables. Woohoo!

Kids, I hear ya!  Personally there is not much I find ultra appealing about plain raw broccoli, or raw cauliflower… but as a whole, vegetables should not be seen as the villainous creation they are made out to be, and ranch as the glowing heroine, here to save the day!

Ranch does not make vegetables a health food. 

Hidden Valley Ranch Dressing contains: Vegetable Oil (Soybean, and/or Canola), water, egg yolk, sugar, salt, cultured non-fat  buttermilk, natural flavors (milk, soy), less than 1% of: spices, dried garlic, dried onion, vinegar, phosphoric acid, xantham gum, modified food starch, MSG, artificial flavors, disodium phosphate, sorbic acid, calcium disodium EDTA, disodium insonate, disodium guanylate, contains: eggs, milk, soy, gluten-free.

That last tid-bit made me laugh.

“gluten-free”. Really? So presumably this dressing, laden with chemicals, preservatives, poisons, like: MSG (monosodium glutamate), inflammatory oils and fats, sugar, and salt…  is okay for the gluten-intolerant? Hardly! Nor is okay for vegetables.

Instead of acidifying and coating veggies in something hazardous, try salsa, a homemade honey mustard, guacamole, or try this dip on for size. Sure, it may be green, and less bleached and pristine than a glistening white and creamy ranch, but it is a natural and healthier source of fat, and naturally contains fiber, protein, calcium, magnesium, and a list of nutrients that are far more satisfying and sustaining than a blob of chemicals. And parents, instead of raw broccoli and raw cauliflower, peeled and cut carrot, celery stick, bell peppers, cucumber, fennel, and sweet cherry tomatoes can be entirely more appealing.

Creamy Avocado “Ranch” Dressing

  • 3 cups mashed avocado, (or about 2.5-3 avocados)
  • 1-2 cups water, depending on desired consistency
  • 1/2 tsp garlic powder (or 2 cloves of garlic, minced)
  • 2 tsp onion powder
  • ¼ tsp black pepper
  • 2 tsp of raw apple cider vinegar
  • 1 tbsp lemon juice, fresh
  • 2 tbsp finely chopped parsley
  • 1 tbsp finely chopped dill
  • 1 tbsp finely chopped chives
  • Sea Salt to taste (1/8 tsp)

Combine avocado with water and blend until smooth. (You may wish to add more water for a smoother, less thick consistency). Add in garlic powder, onion powder, black pepper, lemon and apple cider vinegar. Blend. Add in chopped herbs and quickly pulse just enough to combine. Store in a glass jar in the fridge until ready to use. Should keep for 2-3 days. If brown appears on the top, just remove the oxidized avocado with a spoon, and use the remaining green underneath.

As for the salad…

Garden Salad with Creamy Ranch Dressing

Serves 6-8

  • 1 box organic girl baby kale, 9 oz
  • 1 head of romaine, chopped
  • 1 cup shaved carrot
  • 1 cup frozen organic peas, thawed
  • 1/8 cup red onion, thinly sliced or diced
  • alfalfa sprouts, optional
  • sea salt and pepper to taste

Toss greens and peas with 1/2 cup dressing until well coated. Plate, and top with remaining ingredients. Enjoy!

Read Full Post »

Due to the Texas heat, I recently kicked up my consumption of coconut water, and found myself with a debacle– too many Young Thai Coconuts living uneaten in my fridge, and not enough time to make my own coconut yogurt. Bummer.

However, a tragedy of coconuts was met with inspiration when combined with some new products I received courtesy of generous NuNaturals, and thus dessert became something infinitely more glamourous and decadent than the delightful coconuts themselves.

Behold, an Iced Caramel Coconut Custard to satisfy your ice cream cravings. This one is sure to put other dairy ridden delicacies to shame.

Coconut Custard

For the creamy custard base, I blended the meat of a few coconuts*, accounting for about 2 cups of thick white “meat,” with 1 cup of water. I am a fan of Young Thai Coconuts for their very subtle coconut flavor, creamy texture, and proposed anti-fungal and anti-bactertial properties. I often use them for desserts.

  • 2 cups Young Thai Coconut meat, packed
  • 1 cup water

*Note: (amount of coconut meat will vary per coconut- but if you get your hands on 2-3 medium Thai coconuts with white bottoms (as opposed to pink)– each coconut should contain about 1 cup of thick meat).

To lightly sweeten the dessert, I used NuNaturals Coconut Sugar (Crystallized Coconut Palm Nectar). Coconut sugar is considered to have a lower glycemic index than cane and beet sugars. Ultimately, it is a higher quality and better alternative to other processed and refined sugars, in addition to highly processed sugar substitutes like sucrose and aspartame. Although significantly less processed, and more “natural” than sugar itself, coconut sugar is not a weight loss supplement or a health food. While coconuts do have many nutrients and beneficial fatty acids, we are almost always better off consuming a food in it’s whole form– a.k.a. the whole raw coconut (except when juicing).

That all said, tasting a few of these little bad boy, brown sprinkles, I could not wait to try them out on the unsuspecting gentleman circling my kitchen (husband and boys).

Reminiscent of caramel, (which is essentially heated butter and sugar), the combination was light and can I dare to say, like a tickle to the taste buds? It was the absolute perfect compliment to my coconut mixture. (Which is not so surprising that “like” and “like” would pair well).

Lucky, lucky… My boys found themselves at the receiving end of this dreamy and creamy custard cloud of decadence, and you can too!

Full Ingredients and Method:

  • 2 cups Young Thai Coconut meat, packed
  • 1 cup water

Blended until smooth…

Blended until smooth…

  • 2 cups ice
  • 1 tbsp Maple Syrup Grade B

Pulse. Pulse. Blend. Blend.

Serve in 3 fancy glasses and finish with a generous sprinkling of coconut sugar, cinnamon, and freshly shaved (vegan) dark chocolate.

Bon appétit!

Read Full Post »

Eat well and your skin will radiate.

I am absolutely loving sweet potatoes for my clients right now, and this is one sexy dish you won’t want to miss.

IMG_2725

Sweet Potato Noodles are not only delicious and unique, but so easy to make. Combined with a dairy-free, rich and creamy Roasted Red Pepper Curry Sauce, this recipe helps to promote a radiant, youthful and clear complexion. Because I just could not wait another minute, you get a sneak peak at one of my new favorite recipes that will be featured in my upcoming book on beautiful skin.

Our beautifying ingredient all-stars in this dish are the:

  • Sweet-Potato: Sweet potatoes are high in beta-carotene, which is then converted, and utilized by the body as Vitamin A.  Vitamin A is an antioxidant and helps combat free-radicals that cause aging. Sweet potatoes are also fairly high in potassium, iron, C, and some of the B vitamins, essential for a healthy body and a radiant complexion. (What is the difference between and Sweet Potato and a Yam?– Read on here).
  • Organic* Red Bell Pepper: Ripened green bell peppers, red bell peppers are loaded with antioxidants, Vitamin C and A, and are also a great source of magnesium, which is an essential mineral for detoxification, digestion, and radiant skin. Green bell peppers are off limits to my clients, as they are very difficult to digest, and are not as nutrient dense as the more colorful variety. *Go organic when you can. Bell peppers are one of the dirty dozen.
  • Raw Young Thai Coconut: Young Thai Coconuts have a neutral pH and therefore do not lower our body’s pH level, inviting in pathogens. Dairy products, especially those that are pasteurized, homogenized, and fortified, are highly acid forming, and therefore steal our youth, and can cause acne. (Check out this article for more recipes, and a How to Video of opening a young Thai Coconut here). Coconuts are also a chockfull of skin beautifying vitamins, minerals, protein, and health promoting fats. Particularly, the fatty acid, lauric acid is thought to have anti-bacterial and anti-fungal properties which cause acne.
  • Garlic: Garlic’s potent odor comes from sulfur gas, and it has been used for centuries for medicinal reasons, as well as to ward off evil spirits (or unsuspecting strangers). Sulfur has been shown to promote the elimination of toxins from the blood, lymph, and body. Garlic also has strong anti-bacterial and anti-fungal properties. Read more about it here.
  • Curry Spice: The blend of spices that make up curry combat inflammation, and help with detoxification. Curry spice has been extensively connected with anti-cancer growth and is thought to have many healing and medicinal properties. It a great source of antioxidants, ideal for youthful skin.
  • Red Onion:  Red onions are a great source of antioxidants which help fight free radicals that cause aging. Read more here.

Recipe alert! 

For the Sauce:

  • 1 Sweet Potato, peeled and diced
  • 2 large bell peppers, deseeded, diced
  • 1 yello onion, diced
  • 1 tbsp curry, or more to taste
  • 1-4 tbsp vegetable broth for stir frying
  • 1 cup unsweetened coconut milk, or 1 cup of meat from 1-2 young thai coconuts
  • 1 tbsp raw coconut aminos, or gluten-free tamari

Heat a skillet to high heat and add just enough broth to coat the bottom of the pan. Add sweet potatoes and cover, allowing to steam for a minute. Remove lid and add peppers, and onion. Sauté until the onion is translucent and the peppers are sweating, adding broth only as needed (to prevent sticking). Transfer all ingredients into a high-speed blender and pulse until smooth. Add in coconut meat, or coconut milk, and curry powder. Blend until smooth, and serve over noodles and veggies.

Vegetable Noodles:

  • 3 Sweet potatoes, made into noodles with a spiralizer
  • 1 Zucchini, made into noodles with a spiralizer

Using the same skillet, add just enough broth or water to coat the bottom of the pan. Heat the skillet to medium high heat and add in your sweet potato noodles, covering for 2 minutes. Toss in your zucchini noodles, and pour in your blended sauce. Cover for another 30 seconds- 2 minutes to allow your sweet potato noodles to get to the desired softness you like. Add more curry (+Salt and pepper) to taste and Serve!!

I served these up a cooling cucumber salad and an anti-pasta platter of roasted red bell peppers, baked curried cauliflower and eggplant, as well as shiitake mushrooms.

IMG_2728

It was divine.

Enjoy and share!

Read Full Post »

Older Posts »